 Step 1: Configure ssh-server on the remote Linux machine Edit "sshd_config" file on the remote machine, by running this command: $ sudo nano /etc/ssh/sshd_config Now, make sure you have the below two entries added to “sshd_config” file [Note! “nash” is the username that exists on the remote machine]: # Remote access port Port 22 # User Access AllowUsers nash Step 2: Start the ssh-server on the remote machine, by executing the below command: $ sudo systemctl start sshd Step 3: Working with ssh-clients Option A - Access the remote file system from your local Linux machine using the plan old ssh-client: $ ssh -p 22 [email protected] Option B - Other alternative is a command line based file manager as a ssh-client, this file manager is called Midnight-commander. Midnight-commander (MC) is run from command line itself with the below command: $ mc Now, make use of the MC as a ssh-client. This is done by access the following menu items found in MC "Left > Shell link...". Which then displays a pop-up called "Shell link to machine", now enter the below ssh address: Enter machine name (F1 for details): [email protected] Related resource:
0 Comments
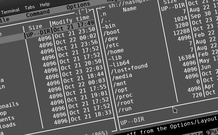
This "HowTo" will show you the setup required to have a dedicated user data partition. This partition will be on a single hard-disk drive (HDD). Once Manjaro linux OS has been installed on HDD1 (sda), we usually notice two separate partitions dedicated for system software. These two partitions are for housing system/application & swap data (i.e. sda1 & sda2 partitions on a single HDD), as seen in the below screen-shot. 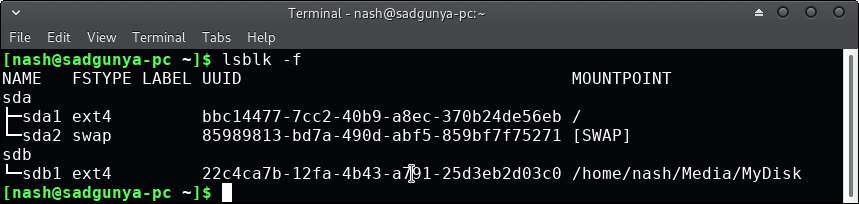 Now, lets see how-to permanently mount an additional HDD2 (sdb) as a single file system partition for housing user data: Step1. Create "msdos" partition-table on HDD2 (sdb) device and then format this entire partition to "ext4" journaling file system. Here, the gparted tool comes in handy to carryout this manual two step partitioning job. Step2. Now, get to know the UUID of the above created partition on HDD2 (sdb). This can be done with any of the below commands. In my case, following UUID was noticed >> "22c4ca7b-12fa-4b43-a791-25d3eb2d03c0". $ lsblk -no UUID /dev/sdb1 $ ls /dev/disk/by-uuid/ $ lsblk -f Step3. Now, create a mount-point for the newly created partition on HDD2 (sdb). This is done by creating a mount-point folder with read/write permissions granted to the user (i.e. in this case "nash" is the user). In-order to do this job, run the below commands: $ mkdir /home/nash/Media $ sudo chown $USER /home/nash/Media/ $ mkdir /home/nash/Media/MyDisk01 Step4. Now, permanently mount the new partition to the above created mount-point. Such a permanent mapping between the partition & mount-point is done by adding an entry to "fstab" configuration file. In-order to do this job, run the below commands: $ su - # echo "UUID=$(lsblk -no UUID /dev/sdb1) /home/nash/Media/MyDisk01 $(lsblk -no FSTYPE /dev/sdb1) defaults,noatime 0 2" >> /etc/fstab # mount -a Related resource:
- [wiki] HowTo - Permanent mount for partition |
AuthorCategories
All
Archives
January 2019
|
 RSS Feed
