 Taskwarrior stores all the tasks data in the following directory => '~/.task'. Hence, the plan is to regularly backup the contents of this '~/.task' directory to Bitbucket's Hg repository. Note! Regular backup implies only when the data is changed in the '~/.task' directory.
Step 1. Setup SSH authentication with your Bitbucket account Follow all the 7 steps listed in the below blog-post in-order to setup SSH authentication with your remote repository: Hg repository: How to setup authentication using SSH keys on Xubuntu 12.04 for multiple accounts on Bitbucket? Step 2. Create a local Hg repository Now, create a local Hg repository in the directory where the Taskwarrior stores data. Hence, the target directory is '~/.task'. So, run the below commands to setup a local Hg repository: $ cd ~/.task $ hg init $ hg add . $ hg commit -m "Initial commit" Step 3. Setup auto commit & push configuration Now, setup a Python script and respective Hg configurations in-order to auto commit & push to your desired Bitbucket repository: a) Follow all the 5 steps listed in the below blog-post, in-order setup auto commit & push: Hg repository: How to automate commit & push on modification to staged files? b) Now, verify that the 4th line in your Python script reflects the correct path of your local Hg repository i.e. as show below: repo = hg.repository(ui.ui(), '~/.task') Step 4. Setup a crontab job to regular run the above mentioned Python script Now, follow the 2 steps listed in the below blog-post: How to setup a job schedular (i.e. crontab job) to run Python script on Xubuntu 12.04?
0 Comments
 Step 1. Install a GUI front-end to configure crontab jobs on Xubuntu Install 'Scheduled tasks' on your Xubuntu, with the below command: $ sudo apt-get install gnome-schedule Step 2. Schedule a task to run a Python script i. Make sure your Python script has executable right, if not run the below command: $ chmod a+x ~/foo.py ii. Now, fire-up the 'Scheduled tasks' GUI, by running the below command: $ gnome-schedule & iii. Lets say, you wanted to schedule the above Python script to be executed once every 3hour-and-15th minute, then your configuration should reflect the below: 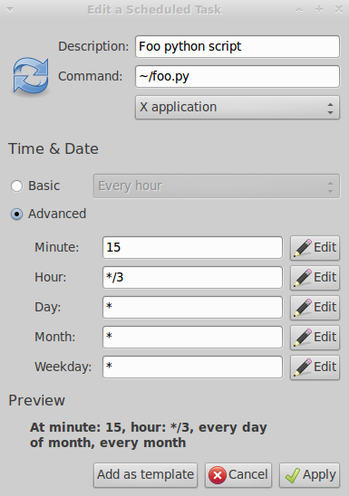 |
AuthorCategories
All
Archives
January 2019
|
 RSS Feed
